Users and Spaces page – Users tab
If you are a PAS administrator, use the Users tab on the Users and Spaces page to manage PAS users. To open this page, select ![]() Users and Spaces on the sidebar menu. The Users tab is shown by default.
Users and Spaces on the sidebar menu. The Users tab is shown by default.
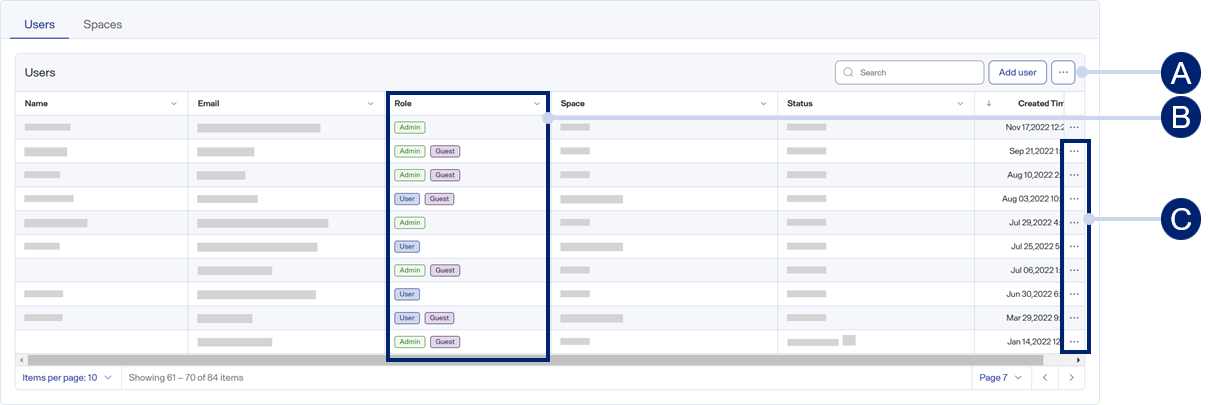
Users tab on the Users & Spaces page
-
Toolbar items
-
Role flags
-
Row menu items
Toolbar items
-
Users / Spaces — If needed, select Users to open the Users tab.
-
Add User — Select to add a new user. See Add a user.
-
 Search — Use to find a specific item. See Search for table items.
 -
 > Display columns — Select or clear checkboxes to show or hide table columns. See Show or hide table columns.
Table columns
-
User — The name of the user.
-
Email — The email address the user will use to log into PAS
-
Role — The user’s role, which grants access to specific PAS functionality.
-
User — Can add plates, create projects, create analysis protocols, view MS data files, and view results files.
-
Admin — In addition to User functionality, can also manage users.
-
Guest — An external user, based on the domain of their email address.
-
-
Space — The comma-separated list of Spaces to which the user is assigned. See PAS Spaces.
-
Status — The user’s status (e.g., Confirmed, meaning acceptance of the invitation to join PAS).
-
 Reinvite User — Select to resend a previously sent invitation to a user to join PAS. See Reinvite a user to join PAS.
An invitation to join PAS expires after seven days.
-
- Created Time — The date and time when the user record was created.
Row menu items
-
 Edit — Select to edit the selected user. See Edit a user.
 -
 Delete — Select to delete the selected user. See Delete a user.